You want your skin to be smooth, even, and beautiful, but…
Here’s your predicament: your skin tone is uneven, with dark spots and scars dotted around. But the solution, foundation, seems too overwhelming—and it doesn’t even cover everything! In this video, Anna K walks you step-by-step through a process to correct and reset your skin, so your makeup can go on flawlessly, every day.
But first, how did those dark spots (hyperpigmentation) and scares get there? Is there something that you can do to prevent and even permanently reduce the appearance of uneven skin tone?
The good news is, yes you can! Let’s go through the whats, hows, and whys so that you can get the results you want.
What is Uneven Skin Tone?
- It’s when the skin has some type of hyperpigmentation that appears as blotchiness, spots, or uneven texture (brown spots or redness, age spots, blemishes, or sun spots).
What Causes Uneven Skin Tone?
- Acne and Acne Scarring. Both can create discoloration in the skin that can have a lasting effect. If you have acne, don’t wait to treat it after the fact when scars have formed. Choose products that treat and prevent acne including cleansers and spot treatments.
- Sun Damage (Don’t leave the house without wearing sunscreen, even on a seemingly cloudy day.) Sun damage exacerbates skin aging at a rapid rate. It also causes fine lines, wrinkles, and sagging.
- Medications
- Hormones
How to Even Your Skin Tone with a Healthy Skincare Routine
- Exfoliate remove dead skin cells, revealing a fresh new layer of radiant skin. This allows your other products to penetrate the skin even better.
- Use a brightening serum (preferably with vitamin C). Vitamin C is the gold standard when it comes to brightening—it is a powerful antioxidant that also protects skin from free radical damage.
- Use a moisturizer with SPF. Keeping skin hydrated keeps it plump and healthy, meaning a strong skin barrier and fewer fine lines, wrinkles, and dullness. The SPF/sunscreen will protect your skin from the damage and aging effects of the sun.
Lifestyle Changes to Even Out your Complexion
- Drink water to stay hydrated from the inside out.
- Add collagen to your daily supplement regimen.
- Restore and repair your skin’s health with products containing retinoids.
- Avoid certain foods and drinks that trigger reactions and aging: alcohol, refined sugar, overly processed or greasy foods.
- Wear a hat to easily shield your face from avoidable UV rays.
Now what you’ve been waiting for…
How to Correct Uneven Skin Tone Using Foundation
- (00:50) Start with a skin smoother to fill in pores and lines.
- (1:30) Use a face primer. Skip the eyelid (because there’s an eye primer for that)
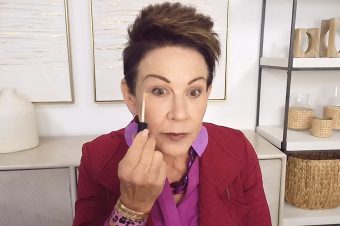
- (2:01) Apply a tiny bit of eye primer to covers veins or lines on the eyelids
- (3:18) Now set your primer with pressed powder.
- (3:55) Use correcter sticks (this will keep you from over-correcting with too much foundation). Use nude to brighten and mint neutralize redness and dark spots.
- (8:50) Apply liquid foundation. Using a buffer brush, dab, and then blend.
- (11:54) Perfect with concealing cream for flawless finish coverage.
- (12:50) Use a large powder brush and powder foundation to set your finish.
Now you have the know-how to easily and expertly apply foundation to even your skin tone. You also have the tips to prevent and reduce the look of dark spots and uneven skin tone. Applying these simple practices will aid in repairing past damage as well as slow the aging process so that you can enjoy smooth, even, healthy skin no matter your age.
More expert skincare and foundation tips:
- Carol’s Anti-Aging Skincare Routine: Fewer Products, More Benefits
- The 6 Makeup Mistakes of Women Over 40 (and 6 tips to fix them)
- Foundation: 4 New Coverage Options in the Color Perfect for You!
Video Transcript:
Are you skipping out on foundation? Stop it. Because it’s amazing when you get it right. I’m going to show you how to apply foundation and how to even out your skin tone.
I’ve pulled my hair back so I can show you step-by-step on how to apply your foundation. I know foundation can be or feel like it’s a little bit tricky, but it’s really not. It’s super easy. You follow these steps and bam, you’re going to have a wonderfully skin-toned face that’s completely ready for all the other colors and fun stuff that you wanna do. It is very fast. There are a few steps, but once you get it, it’s so easy to just bam, bam, bam, bam.
We’re gonna start with a Skin Smoother. I’ve already put on moisturizer and my skincare, and now I’m just going to do a little bit of smoother. And I love this because it fills in the pores and it fills in some of our, you know, crevices, creases. So when we put on our foundation, it’s just lovely and it really doesn’t feel like you’re adding anything. It just is helping to fill in those pores, fill in some of your fine lines so that we are ready to put on the foundation and it doesn’t sink into those fine lines. That’s a big no-no. We don’t want that. That’s why a Skin Smoother’s important.
Now we’re jumping right into the primer, which everyone knows how I feel about primer. Without primer is just going to slide right off your face, so you use the primer. And I’m just going to use my fingers again, upward motion, filling in all the stuff. I am going to avoid the eyelids because I’m going to use the Eye Primer. It feels good. It smells good. It’s got a little luminescence to it. I just kind of finish it off with my neck. Yeah, that’s great. Feels good. Let that set for just a second, and then while that’s setting, I’m going to use this Eye Primer and this eye primer is off the charts, amazing. And you just need the teeniest, tiniest little bit. And I always use my ring finger, if I’m not using a brush. I’m not going to use the brush today for this and teeny, teeny, teeny tiny little itsy-bitsy. And then I just put it on both, even it out on each finger, and then I just tap it onto my lid and this really does help to cover any veins or lines. And as we get a little bit older, our veins surface a little bit if you’ve noticed. If you haven’t, awesome for you. And I’m just going to add a little bit more because I can, and I want…my veins really surfacing today. I don’t know why, but thank goodness for primer because this going to fix it.
So, as you can see right there what that did, bam, gone. So this is one of the reasons you want to wear a foundation. This really does even out that skin tone, this little step right here. It’s awesome. Voila, I love it so much. Okay. Now that that is on, the very next step I’m going to do, and it’s going to seem a little bit strange, but it really does help your foundation to stay on and give it that extra punch. I’m going to just put a little bit of powder on and set all the skincare that I just did. So most of this stuff doesn’t have color, now we’re just going to set it. And it’s just a light brush. It’s really quick, really easy. Just an upward motion usually. You can go down the nose. And it just really helps to set that. And we’ll come back to this powder at the very end.
Now I’m going to jump into our foundation cover sticks, love these. I’m going to put this right into the corner of my eye because lots of times right here, it gets very dark. And we want to lighten that up. It brings the eye forward. It really makes the eyes look fuller and bigger, and they just put that right into the corner. Just like that. I know it looks kind of funny right now, but we’re going to blend in a second, and then I use the medium. This is the medium one. And I’m going to come under the eye right here, and I’m going to stop halfway in. And I’m going to tell you why do that? Why don’t cover all the way over? Because when you use your brush, it kind of does it for you. Now you’re just going to blend right in and you can take it into this top part right here because it really does get kind of dark in that corner.
You can always smooth out with your finger. Don’t be afraid to use your fingers. You bring this in, and down, and out. The warmth of your finger really does kind of help blend things as well. So what this is doing is this really blending into your skin and highlighting all the right places and it’s covering any of your bags or dark circles under your eyes. It’s really lightening that up. Again with the finger, I’m just going to drag it over, but with the brush, you can get right underneath those lashes, which is really nice. But now you don’t have too much product on. So when you go back to put your foundation on, you go back to put your powder on, it doesn’t get cakey and feel like there’s too much. It just is just enough. And if it does feel like it’s getting cakey, you can always go back in and blend it a little bit before you powder anything.
Now, if you have medium skin tone, you can always go up. So you would use the medium color on the inside rather than the light, and then the darker color here underneath, and you just adjust it to your own skin tone. So I’m a light-medium, so if you were to be a medium, I would just kind of shift that up. So now that I have that on, you can kind of see it’s a lot lighter underneath my eye. Don’t worry about that. We’re going to even that out with a foundation, which is what foundation does, it evens out the skin tone. At this point, what we’re just doing is correcting. We’re just correcting everything to perfection. This is the mint and don’t be afraid of mint. I know it’s green, but it’s a light green. That’s not as intimidating as green-green.
So on a color wheel, you do the opposite to neutralize the skin tone. So if you have a lot of red in your skin, you can use this green color stick and it neutralizes those colors. If you ever do color theory or anything like that, it’s absolutely fascinating to see what colors can counteract and neutralize. So I’m going to show you how to use this green stick. It’s just like the others. And I have a few places. One up here. It’s always red for whatever reason. I don’t know if you have something like that on your face, but I’ve got a few of them. One down here. I don’t know why, it’s always red. This cheek is a lot redder than the other cheek, and I think it’s because I just went to town as a teenager, and so now it just has this redness.
Now a lot of people have a lot of red around their nose. I have a little bit of that, not a ton, but the nice thing about this is that you can really intensify. You can go into it quite a bit and you can add to it or just add a little bit. Now I know it looks a little funny right now, but don’t worry, it’s going to blend. We’re going to use our brush. I’m going to use this little lush side on my corrector brush and just kind of get right in there and blend things a little bit. Again, you’re going to see a little bit of that green color. Don’t worry, We’re going to make sure that that is evened out. And this is how you get that skin tone perfect with the foundation. So all of these steps are leading up to the foundation. And then like for this one, I just want to make sure that it’s blended really well so I don’t have like a green spot that looks different than over here. We’re just neutralizing.
Sometimes it helps to get that finger involved. The temperature in your finger is warmer than on the brush, I mean, for most people. Sometimes my fingers are cold. And then right here. And I still feel like even down here on the chin, it’s still a little bit red, so let’s just go ahead and just..and you can see it’s not like it has to be perfect. It’s just kind of you roll with it. And this is why we use the Skin Smoother because it really gets into those pores and fills those pores up really nicely. Okay. That’s fantastic.
Now it’s time for the foundation. I’m using the satin finish, it’s one of five satin finish, with my foundation brush. I love this brush. It’s absolutely amazing. And if you’ll notice, what I have on here is just such a minimal amount. It’s like not even a full pump. I just ping, and you can always add more, but it’s really not a lot. You’ll see. Watch. So I just dap it on in a couple of different spots like this, and I have a little bit of a scar up here I to take care of. And then I’m going to put one there and I’m going to put one there. And now I go into here and you just start blending that.
Now, and sometimes the tapping really helps too, but you’ll notice like where that red was, voila. It is gone. I love it. And you’ll see like right here on my nose, I’m adding that in and you’ll see that the green has just completely neutralized all that red. I love this brush because using your fingers, you get smears, and with this you have, like, you can tap with this brush. You can do the swirl. I like the swirl and then the tap, and then right underneath the eye is where I just take the residue of what’s on there. I’ll do this one side so you can kind of see the difference.
And again, done, done, done. Done, done, done. Now, I’m avoiding putting foundation on my eyes because I already have the primer. You don’t need a foundation on your eyes. Sometimes out of habit or just you’re in the moment, it can happen, but try to avoid that because you have the foundation, the color’s really gonna stay with just the primer and not the foundation on there. So you can see what that has done. And I’m going to go back into this side before it starts to dry. It really helps to even out that skin tone, as you can see, like what I’m doing right now, getting that to a place where you don’t see red, you don’t see the bags under the eyes, you don’t see any of that stuff, and it looks really nice. It looks like, “Oh, she’s not wearing any makeup at all.” And that’s exactly what foundation’s supposed to do. It’s supposed to even out the skin tone so that it doesn’t look like you have any red, any purple, any blue, none of that underneath your eye. It just helps to take care of all of that so you have a perfect, even-toned skin palette to work from. So you can put your color on and it’s magnificent. So get magnificent. Use your foundation.
Okay. Now I want to talk about this. So after I’ve put that on, I’m going to wait just a second before I put the powder on so we can talk this. This is the concealing cream and it comes in a wand. Now I like the sticks because you can have some control over it, and this is a little bit more liquidy. I had a lot of red on this side, I used the green, but with this concealing cream, you can see I have a few little things here. It just kind of helps to narrow it down in that area. Pat, pat, pat. Done, done, done. If I feel like, oh, I didn’t quite get, or maybe I got a little bit too much rubbing this, I’m just gonna put this in here and kind of tap it into that corner to lighten it just a little bit more. And you can see like, it has a different application. I like to use it for this exact reason right here. It’s like, oh, well, it did pop through a little bit. I’m just going to take care of it with this concealer. Boom, boom, boom. Done.
Now to make sure that this stays, you’re going to want to use your powder. It’s so important to use your powder and this brush, it’s amazing. It’s soft and it’s just like a little bit of heaven big pillows on your face and it feels so good. I always put a lot of those. Well, I don’t put a lot of the powder on, but I just rub it around because feels so good. You, guys, you got to try it.
The reason you want to use this brush instead of your foundation brush is your foundation brush has much shorter bristles and it’s harder. It’s really going to get into your skin. It’s going into your pores where this one’s just a light tap and you can actually tap a lot of this on too. It really does help to kind of put a little bit of extra powder right underneath your eye or in your trouble spots if you’re oily. So that would be your T zone. And usually, it’s right under the eye. So, at this point, I also like to just quickly powder my eyelids, kind of set that primer a little bit. And that’s it.
Using these products can be very simple, very easy, and once you get into a routine, it’s very, very fast. It’s important that you do use them all and do that step-by-step so that you can have a face that’s ready for all the rest of your makeup and it will stay on beautifully. Having a good foundation really is the foundation, That’s the name, the foundation of the rest of your makeup. It sets everything up so that you can have a successful makeup day. And that’s what we all want in the end. Right? That’s what I want.