Are your eyes looking a little tired?
Dark circles, dark spots, blemishes, and sallow skin are easier to correct than you might think! With just a little understanding of color theory, you can use cover sticks to quickly and easily brighten your eyes and even your skin tone. Anne K is here to share her makeup expertise with you so that you can feel competent and confidant in the art of color correction.
Remember, makeup is a temporary solution and one we are grateful for but don’t underestimate the long-term benefit of an anti-aging skincare routine and healthy lifestyle practices for radiant and youthful skin with or without makeup.
What are all the colors for, and how to know which color to use for what problem? Simple, it’s all about opposites (1:13).
- (0:54) Mint for red.
- (1:22) Lavender for yellow and sallow.
- (1:36) Yellow for purple or grey areas.
- And of course, select the neutral of Light, Medium, or Dark to match your skin tone.
Now let’s see how to use them!
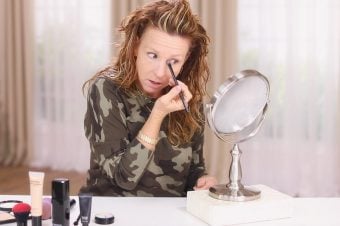
- (1:47) Starting with the skin.
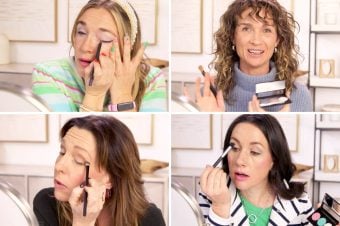
- (3:24) Now for the eye-brightening magic! (Tip: Look up, your eyes may not be as dark as you see)
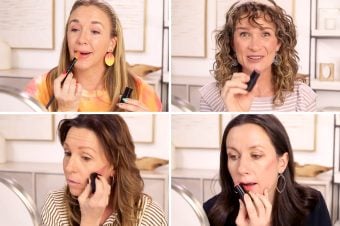
- (4:58) Finish up with the foundation and powder of your choice and now you’re ready for color.
Dark circles and uneven skin tone are a thing of the past. Use these color techniques and cover sticks to brighten your eyes and even out your skin tone for a beautiful and flawless foundation finish.
Shop DYT Cover Sticks and Foundation!
More expert foundation tips:
- How To Correct Uneven Skin Tone (Plus: How and Why It Happens)
- The 6 Makeup Mistakes of Women Over 40 (and 6 tips to fix them)
- Foundation: 4 New Coverage Options in the Color Perfect for You!
- Does Concealer Confuse You? This Important Step Is Actually Very Easy!
Video Transcript:
Do you have imperfections on your face? I know I do. They’re all over the place. And today we’re gonna talk about color techniques and how to fix it.
Today, specifically, we’re gonna be talking about dark circles. Now I must say my dark circles have improved incredibly since I started using the eye corrector serum. And so they’re not as bad as they used to be, which is amazing. And everyone should go get that. If you don’t have it, definitely put that into your skincare regimen because it makes a huge difference. I don’t know how it works. It’s magic in a bottle. Delicious. So once you’ve used that, you would go on to using some of your color correction. Now we have several different items. We’ve got a minty green one. Now this covers up red. I wouldn’t put this underneath my eyes, we’re trying to get rid of the greens and blues and purples, but I would put this on red. So this one guy right here, over here, I’ve got just like some fun little blemishes. And that’s really what the mint is meant for is for red.
So think of a color wheel. So if you have green over here, the opposite of that color, what it’s going to counteract is the red. So that’s true for all of these. So I have a lavender here that would cover up anything yellow. So if you have sallow skin, or if you’ve got some yellow patches going on, lavender is gonna be your friend. Now we actually do have yellow, and yellow helps to cover up the purples and the lavenders. So again, just look at your color wheel. And it kind of helps you in your mind figure out which one goes to which.
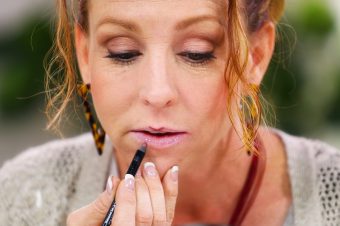
Now today, I’m going to use a little bit of the green, a little bit of this minty. And I’m gonna just put it on some of these little blemishes that I have. This isn’t a really fun sun blister that I got gardening. And I just actually put it on with the stick. And this stick, like, it’s gonna last you like till the end of time. It’s, like, great. And like you see, I can just do a little teeny tiny bit. And it’s done it. Now you can kind of see like, “Oh, now I’ve got green dots all over my face.” Don’t worry about it. We’re gonna fix that with the foundation once we put it on. Now I’m looking to see if there’s anything else. I do have a little bit of a red patch up here. Now also it helps when it warms up to your own skin tone, it kind of melts just right in. And a little tap, tap with your finger doesn’t hurt anything. It just helps to blend that in. This one’s really taking to it nicely. Once you put the…I don’t wanna mess with the lip line. I don’t wanna counteract my lips, my nude lips. There. It kind of helps with that.
Okay, so moving right along, we’re gonna go to the lavender, which helps cover up the yellow. Now I don’t…I personally do not have a ton of yellow to cover up. Although if I were to, I would say right here a little bit, maybe on my cheeks because they get a little bit sallow. This is really for a lot of sallow skin. Now don’t worry if it looks funny, because it looks funny. We’ll fix it. And the yellow is what I really wanna get to, because that helps cover this right here. Now, I always thought I had dark circles, always, always, and I do have some of that going on. But I also want to make sure that when you’re doing this, a lot of the application is going to be with your chin tip down. Now just remember, as you’re doing your makeup, to remember to look up and all of a sudden those blue and purple eyes will go away because you have cover on them. But as you’re doing them, the shadow from your eyebrows will come down to the tops of your cheekbones, causing it to look more purple than what it is. So just keep that in mind when it’s all said and done. Remember, lift up your chin.
I’m gonna just hit this light coverage that I have right here, just in the corner. Now this is just a light cover stick. Again, I love the cover sticks because it’s super easy and ready to go. You can throw it in your purse if you need to touch up later on. It’s very, very simple. And like you don’t need a brush which is great. Now you can use a brush. Absolutely the concealer brush is amazing. And definitely you can do it. Now a good question would be does this work for all skin tones? Yes, all the colors do work really well. So the mint, and the lavender, and the yellow will work. It’s using your cover stick in your own skin tone is what will marry those together, and also your foundation. So now that I have that on, I’m gonna brighten the corner of my eye with a cover stick. Yep, we’re about where I want to be, about what I need for today. And now I’m just gonna jump right in and add my BB cream. And I’m just gonna do it like I normally would. I’m gonna pull my hair up just a bit.
Okay, now, I’m gonna start with the chin and kind of work our way up. So when you get to the points of where you want to have the color act, I’d like to do a tap, a little bit of a tap, rather than a major brush. Like here, I can brush, but when I’m going over these cheekbones where I have a little bit of that yellow, and right here under the eye, I’m gonna do a sweep, but then I’m gonna tap because what the tapping does is it’s like a stippling effect, versus like a blending effect. You do wanna blend these all together, but you can do it by stippling it, which really is great. So that’s why you see me do dot, dot, dot, dot, dot, dot. I kind of dot it over my face, and then I come back in. And like this, I really do wanna get that bright to blend a little bit. So I’m gonna blend and then stipple, stipple, stipple.
Now the stippling helps to keep the color in its place, and helps to blend it together as well, like I did right here. And then it really does give a nice, flawless, beautiful look. And it doesn’t feel too heavy. I don’t have too much on. We don’t want anything to settle. So as I’m looking down, it’s like oh no, I didn’t actually cover it, but then lift my chin and voila, they went away. So if you’re looking down in the mirror like this, you can see there are circles. But remember, when you’re outside and you’re out in your life, lift up your chin because you’ll lose your dark circles you didn’t even really have. So you can see how well it’s been blended together. Actually, is there anything that I’m looking, looking to see if I want to cover any more? That one, my little sun blister. Let me grab the minty one, you can go back in and cover it just like that.
Now for this one, I’m not gonna go back in and blend it. I’m just gonna go ahead and powder it. It seems to blend in really nicely. And I’m just using the powder that matches my foundation. Stipple, stipple, over that. I always do my foundation first before I get ready for the rest of the makeup. But that is about it. And as you can see, it took care of a lot of flaws. By using these color techniques, it will really help you to get your skin that maybe not be in the perfect condition to be in a flawless condition. So make sure you have the color sticks that work for you and try it and let me know how it goes.