Banish bleeding lipstick for good, and kiss feathering lip color goodbye!
Anna K shares her tricks of the trade from her years of experience as a movie makeup artist. This process is perfect for a longer-lasting lip look and is especially great for women over 50 who may have noticed feathering around their lipline. It only takes six simple steps and you’ll have lips that last for hours!
What you’ll do:
- (00:58) Prime– Set the stage to keep the color true and prevent fading.
- (2:18) Line– Create a boundary for the color.
- (3:25) Lipstick– See the proof of the primer!
- (4:03) Gloss– How it affects the life of the lipstick.
- (4:51) Concealer– This step is key.
- (6:16) Here’s the trick! You’ll need a tissue for this step.
What you’ll use:
- Eye and Lip Primer
- Concealing Cream
- Concealer Brush
- Dual Blend Powder Foundation
- Powder Brush
- Type 1 Lip Colors
- Type 2 Lip Colors
- Type 3 Lip Colors
- Type 4 Lip Colors
Wondering what color of lipstick is best for you? Start your Free Dressing Your Truth Beginner’s Guide today to learn your Type, and never have to guess on makeup colors ever again!
More Lip Love Videos:
- Lip Liner With No Feathering or Fading—X Marks The Spot
- How to Have Soft Kissable All-Day-Color Lips with the Lip Collection
- How-to: A Nude Lip Look That Stays Put
Video Transcript:
Hi, I’m Anna K, the Dressing Your Truth makeup expert and I’m here today to talk to you about some really fun tips and tricks I have for you. But first of all, I want to tell you a little story about how many women I’ve worked on. I’ve worked on a lot of women through the years, probably the last 20 or so years. And I have had tons of problems to work through but one of the ones that keeps surfacing and keeps coming up are lips, and how to get your lipstick to last longer, not to be as chapped, no fading, the bleeding. It’s a big hot mess and can be with you’re onset all day long trying to reset it. Now for the average woman, you want to just get your lipstick on and be done. You don’t want to have to touch up every hour or two to make sure that it hasn’t bled out somewhere or isn’t fading or it still looks beautiful. Today, I’m going to show you how to help your lipstick to last longer. It’s super easy and anybody can do it, even you. So we’re gonna start right here with our lip primer.
Now this primer that we have also works for your eyes, but I’m going to use it for the lips. Now the reason that we use primer for…there’s a couple of different reasons. First of all, it helps to keep your lips so that the lipstick shows its true color. Now sometimes you can skip this step especially if you don’t have any feathery or bleeding issues. If you do have that, I always recommend that you use a primer and you just put this on everywhere. It totally neutralizes the color in the lip. And I like to rub your lips together, but almost to a point where you can draw on your lip liner anywhere so you can make your lips fuller or thinner or whatever issues that you may feel you have. If you feel like your lip on the top is a little bit smaller, you can accentuate it a little bit more with the lip liner. Same with the bottom so that they can feel and are a little more even. Now a question you may have is does the primer need match your lip color? No, it really doesn’t. The idea is just to neutralize the lip so that whatever color that you put on it is going to be that true color. Now I went into my lip line just a little bit with it and the reason I did that is because that’s going to help stop the feathering that happens sometimes with lipstick.
Next, I’m going to use a liner. Now this liner is vintage. It’s one of our new colors. I absolutely am in love with this color. It’s really fantastic. I always start in the middle on the bow and work my way out just like this. Now the idea of liner is to not necessarily see the line, so you want to do a little bit of blending and you can do that in the corners by filling in a little bit like this. Doesn’t have to be perfect and I really try to rub that in. It’s slightly uncomfortable but it really does keep that line in check and helps any sort of feathering that you might be having. Now is this going to last 24 hours? No. It’s really not. And after you eat a meal, you’re probably going to want to check your lips. But it will last until you eat your meal anyway.
So the next thing we’re going on to is Mocha Rose. This is just a very moisturizing lipstick. It’s nice, it feels very lovely on the lips, and a slightly lighter shade than the lip liner because the lip liner does what it’s supposed to do, it’s supposed to line the lips. It’s supposed to give it its shape and look. But that is really simple and quite easy and you can see my lip is exactly the color of the lipstick, which is really great and that’s what we’re looking for. I want it to be this color.
Now it’s always great if you, because the lip is a little bit matte right now, if you want to pop that or make it shine, it’s always great to add a little bit of gloss to the top of it and it completely fixes that and makes your lips look a little more supple and a little more plump which who doesn’t love a plump lip? Let me tell you. I love plump lips. Now you may ask yourself by putting on this lip gloss, will it shorten the life of that look of the lipstick? And the answer is yes, that is something that you’re gonna have to decide if you want to sacrifice or not. It’s because it’s a little bit glossy and it’s very smooth and it does rub into the lips, it’s easier to come off a little bit more than a matte. But I love the look of it, I don’t mind adding a gloss every once in a while. The lipstick will stay on a little bit longer and you can always just add the gloss.
Now I always like to at the very, very end of the look, which I think this is pretty great and I think it’s a pretty neutral color, it will go with a lot of different things, I do like to use it’s the dual-action concealer that we have. This is light-medium that I’m using and I’m going to go back to my concealer brush and I’m just going to put a little bit of this on here and I’m going to go around the lip. Now this is what helps stop the feathering and it’s fantastic. You’re gonna absolutely love what this does. And it kind of does a little concealing too at the same time and who doesn’t love that? Lemme tell you. It’s almost like it’s a highlighter that goes around the lip and I like to just kind of blend in with my finger a little bit. Make sure you use that right ring finger and then I’m going to go on the top. This is my trouble area right up here, the pucker part. So the pucker part needs a little bit of love. And I’m just going to add it like this. Super easy, and blend a little with my finger here. And if I see anything else I want to kind of take care of I just rub it right in. Take care of that guy. Woo, how did he get there? All right. And it adds a nice highlight.
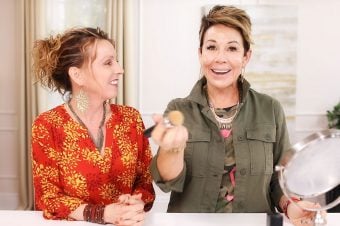
The last trick I’m going to show you is not as common but it works really well. The idea behind this trick is to really set the lipstick so it’s going to stay for a long time. What you’re going to want to do is get a tissue paper and put it on the lips. Now I’ve already got some gloss on there so it’s going to hopefully stick there pretty nicely. Meanwhile, I will have powdered my kabuki brush which I love so much with my two-way foundation in perfect beige and I’m going to put this on my lips and then powder it and the little bit of powder that comes to the tissue will help to set it so it doesn’t look so pasty. That’s the idea, we don’t want it to look pasty, we just want to set the lipstick. [inaudible 00:06:58]. Voila. You still have a little bit of the gloss, it’s definitely helped to pat it down a little bit and set it with the powder which is the important part. So this will stay hours. This will last you a really long time. And if you do need to brush up or put something else on, you can always pump it up with a little bit of gloss which will last for a little bit longer because you have set it. So that’s important that you go ahead and put the little bit of powder on at the very end.
And that’s how you do it. It’s really easy. These steps, anybody can do them and it’s really, really super fun. All of you are an artist, I know it. So pull out the artist in you and make it happen. And if you’re missing any of these products, say the primer, that’s not a very common one or you don’t have your kabuki brush, go to the DYT store, they have loads of it. Make sure that you pick up your supplies that you may need to accomplish keeping your lips longer, lovely, lasting. I really want to know how this works for you. So make sure you share your comments and questions and I’m happy to get back to you about any questions that you have. Make sure that you live beautifully, ladies.


